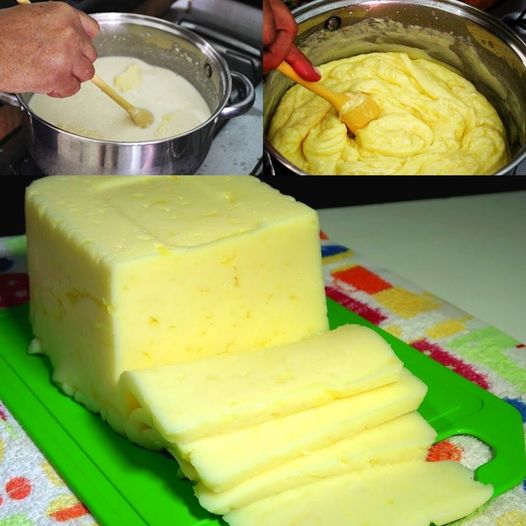
How to make Cheap homemade mozzarella recipe!
Crafting homemade mozzarella cheese is a delightful culinary adventure that not only saves money but also offers the satisfaction of creating a delicious dairy delight from scratch.
This traditional Italian cheese, with its smooth texture and milky flavor, can be easily made at home with just a few basic ingredients and some patience.
To begin this cheese-making journey, you’ll need only a handful of inexpensive ingredients: milk, citric acid, rennet, and salt. These ingredients are often readily available at your local grocery store and won’t break the bank. With these simple components and a bit of kitchen magic, you’ll soon be on your way to enjoying your very own homemade mozzarella.
The process starts by heating a large pot of milk to a precise temperature, typically around 55°C (130°F). This gentle heat helps to activate the milk proteins and prepares them for the next step: acidification. Citric acid, a common kitchen ingredient, is added to the warm milk to lower its pH and encourage the formation of curds. This step is crucial for achieving the distinctive texture and flavor of mozzarella cheese.
Once the milk has been properly acidified, it’s time to introduce rennet, a natural enzyme that helps coagulate the milk and form curds. A small amount of rennet is added to the milk, and then the mixture is left to rest for a short period. During this time, the rennet works its magic, causing the milk to thicken and develop into a gel-like mass.
Once the curds have formed, they are carefully cut into small pieces to release the whey trapped within. These curds are then gently heated to a higher temperature, typically around 88°C (190°F). As they heat up, the curds shrink and expel more whey, eventually becoming dense and elastic.
Now comes the fun part: stretching the curds to form the familiar shape of mozzarella cheese. The hot curds are scooped out of the pot and kneaded by hand until they become smooth and shiny. This process helps to develop the cheese’s characteristic stretchiness and ensures a creamy texture.
Once the curds have been stretched and shaped, they can be molded into individual balls of mozzarella cheese. A sprinkle of salt can be added to enhance the flavor, although this step is optional. The cheese balls are then chilled briefly to set their shape before being enjoyed.
The resulting homemade mozzarella cheese is a thing of beauty: creamy, flavorful, and utterly irresistible. It can be enjoyed fresh on its own, sliced and layered onto sandwiches, or melted over pizzas and pasta dishes. Best of all, it’s a budget-friendly alternative to store-bought cheese that is sure to impress your friends and family.
So why not roll up your sleeves, gather your ingredients, and embark on a cheese-making adventure? With a little time and effort, you’ll be rewarded with delicious homemade mozzarella cheese that is as satisfying to make as it is to eat.
Ingredients:
- 1 small box of cornstarch 200 g
- 1 pot of butter or margarine 250 g
- 2 packets of grated Parmesan cheese 100 g
- 1 pinch of salt
- 1 liter of milk
Preparation:
First, mix the milk, cheese and starch without heating, just to remove the lumps by stirring a little.
Then add the butter, turn on the heat and stir until it melts completely.
Keep stirring until our cheese reaches the point, that is, when it releases easily from the pan.
Then just put it in a mold (we
usually use glass dishes or ice cream tubs) and
wait for it to cool.

