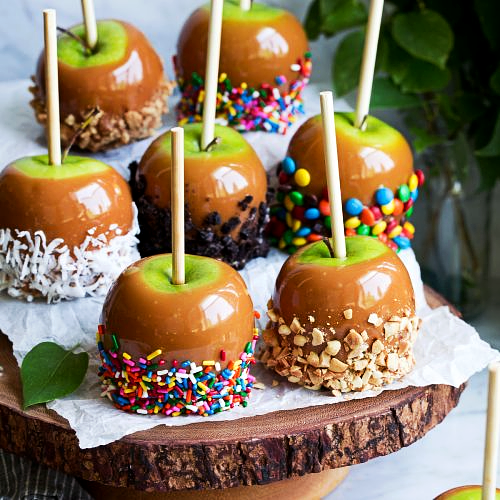
Caramel apples are a quintessential treat, especially during the fall season, when apples are harvested and everyone is in the mood for cozy flavors and warm festive activities.
These delightful confections combine the natural crunch of fresh apples with the rich, creamy sweetness of caramel, resulting in a mouthwatering experience that’s both nostalgic and indulgent.
**What Makes Them Easy?**
This easy caramel apple recipe streamlines the process, making it accessible for anyone, from novice cooks to seasoned bakers.
There’s no need for complicated candy thermometers or laborious boiling methods. In this version, we utilize store-bought caramel or simply melt caramel candies with a touch of cream, allowing you to whip up this treat in no time.
**Serving Suggestions:**
Caramel apples are perfect for fall gatherings, Halloween parties, or simply as a fun family activity. They can be served whole or sliced into wedges for easier sharing. For an elegant presentation,
you might even place them in decorative bags or boxes if you’re giving them as gifts.
**Storing Caramel Apples:**
Store any leftover caramel apples in a cool, dry place. If you’ve topped them with nuts or chocolate, it’s best to keep them in an airtight container in the refrigerator to maintain freshness.
They are most delicious when eaten within a few days, but they can last for up to a week if stored properly.
**Conclusion:**
Easy caramel apples are not just a treat; they are a celebration of flavors and textures that encapsulate the joys of the fall season. With their sweet, gooey caramel exterior and crunchy apple interior,
they are delightful to eat and are sure to bring smiles to everyone who enjoys them. They’re also a fantastic way to engage family and friends in a fun kitchen activity, making memories one bite at a time. Whether you’re indulging solo or sharing them with loved ones,
these delightful treats are sure to become a new favorite in your seasonal repertoire. Enjoy the sweet simplicity of easy caramel apples this fall!
Ingredients:
EASY CARAMEL APPLES
- 7 cups water
- 3 tablespoons white vinegar
- 2 large Granny Smith apples
- 2 Pink Lady apples
- 4 sticks
- 2 14 oz. bags wrapped wrapped caramels
- 4 tablespoons water
- 1 teaspoon vanilla
- toppings of your choice
- 2 cups semi-sweet morsels
- 2 cups white chocolate morsels
- 1 cup dark chocolate morsels
- ½ cup chopped peanuts
- ½ cup Heath Toffee Bits
- various Halloween sprinkles
- Halloween Nerds
Instructions:
EASY CARAMEL APPLES
Prepare a baking sheet by lining it with parchment paper and spraying it with cooking spray.
Pour water and vinegar into a large bowl. Wash the apples in the vinegar solution, drying them off completely.
Place the apples on the baking sheet and place a stick into the center of each, stopping at about 3/4 of the way through the apple. (This was the most difficult part of the process.)
Place the tray of apples into the freezer while preparing the caramels.
Unwrap the caramels and place into the top of a double broiler. The bottom should be filled halfway with water and brought to a simmer.
Add water and vanilla.
Stir continuously until caramels are completely melted. This could take you a little while, but just be patient. It will be worth it.
Do not boil the water and leave caramels unattended. You don’t want burnt caramel. Don’t ask me how I know. Remove apples from the freezer and remove caramel from heat.
Using one apple at a time, dip the apple into the caramel. Gently and slowly spin the apple until it is completely coated.
Allow excess caramel to drip back into the pan. Place onto prepared baking sheet and repeat with remaining apples.
Put the tray of apples into the refrigerator for at least 20 minutes for caramel to set.
Put desired toppings ie, candy, nuts, sprinkles into separate bowls.
If using chocolate for a second coating, place morsels into a microwave safe bowl and microwave for 30 seconds. Remove bowl and stir.
Remove apples from the refrigerator and one at a time, gently roll the apple in the chocolate followed by desired toppings.
Place finished apple onto a prepared baking sheet and refrigerate for 30 minutes until toppings are set.

