Secret Kiss Cookies are soft, cake-like morsels with rich chocolaty flavor. Baking in a mini muffin pan gives these treats their distinctive round shape, perfect for hiding a candy kiss inside.
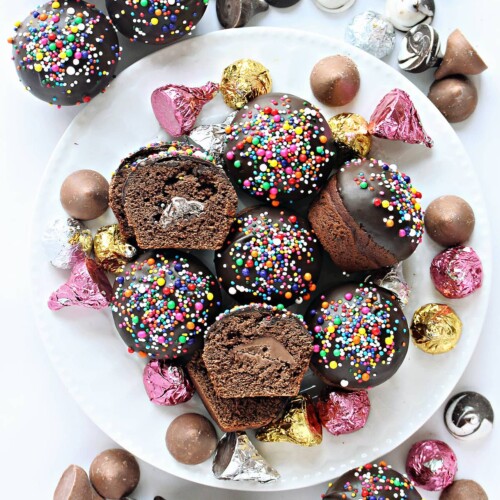
Chocolate kisses and ball shaped Secret Kiss Cookies dipped in chocolate with multicolored nonpareils.
Why you’ll love this recipe
Unlike some recipes that you bake once a year for a particular holiday or season, Secret Kiss cookies are an incredibly versatile year round treat. Their festive sprinkles brighten holidays, gatherings, gifts, and care packages.
The bonbon-like shape is formed by baking in mini muffin pans. The result is a soft cookie with the airy texture of a little cake.
There are so many ways to customize these.
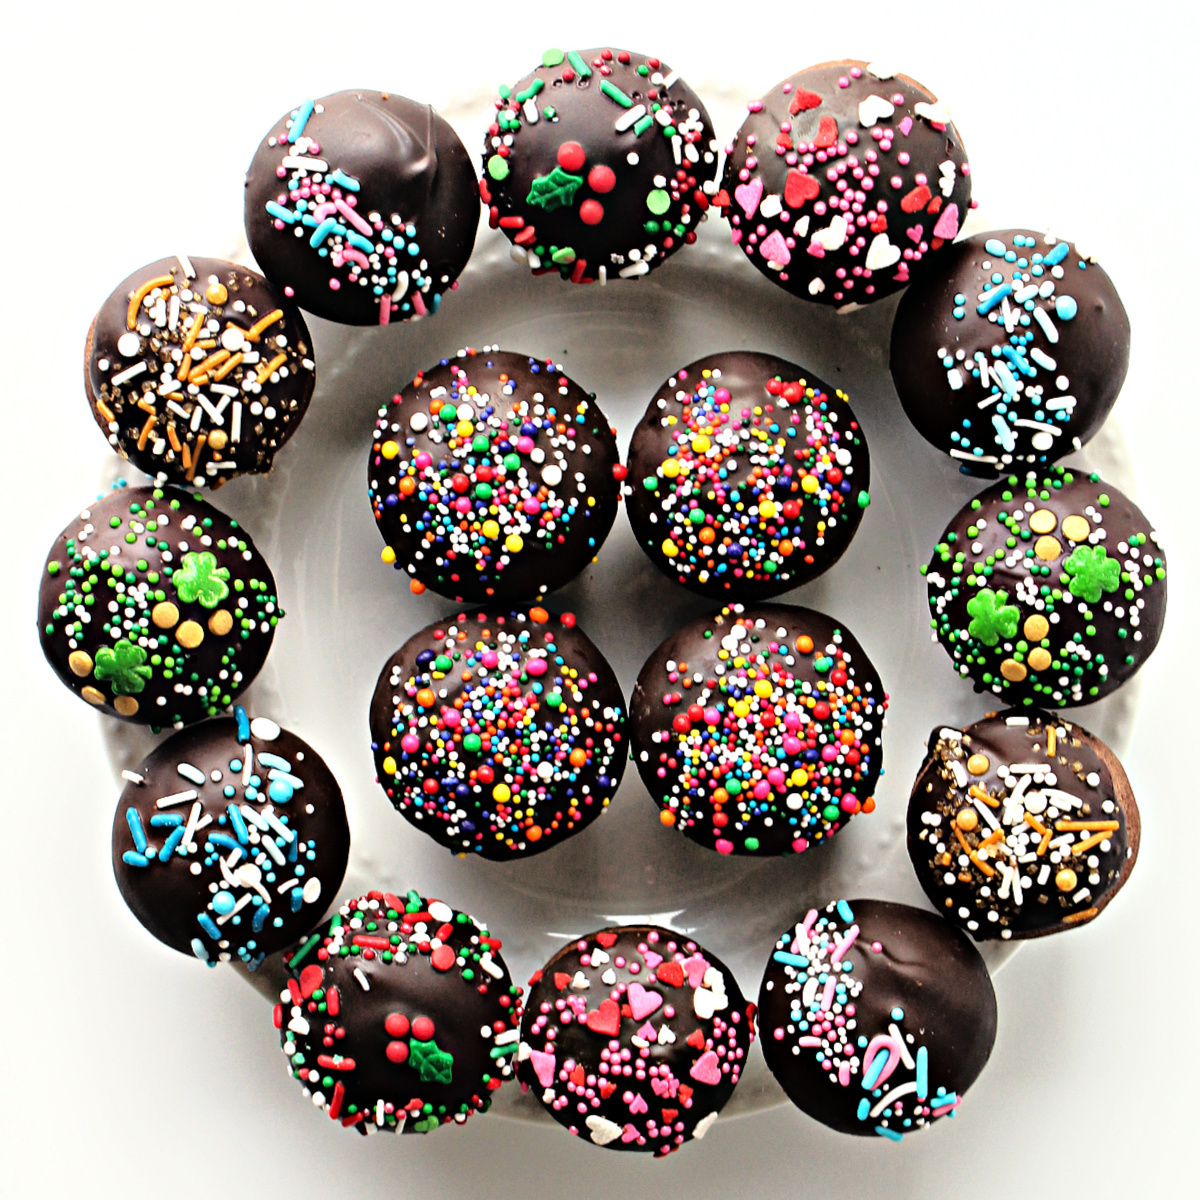
Add sprinkles for holidays or team colors.
Use kisses with holiday flavors.
Get fancy with kisses that are layered or swirled.
Color the kisses pink or blue for a gender reveal party surprise.
Skip the sprinkles and pipe zigzags of chocolate on top.
These chocolate topped, cake-like cookies have a delicious hidden chocolate surprise inside. Great holiday cookies for every occasion.
Course: DessertCuisine: American Prep Time: 45minutes minutesCook Time: 30minutes minutesChill time: 1day dayTotal Time: 1day day 1hour hour 15minutes minutes Servings: 48 Calories: 188kcal
Ingredients
- 1 cup unsalted butter melted
- 4 ½ cups all-purpose flour
- ½ cup unsweetened cocoa I use Whole Foods 365 brand fairly traded baking cocoa
- 4 ½ teaspoons baking powder
- 1 teaspoon baking soda
- 1 ½ teaspoons espresso powder
- ½ teaspoon salt
- 1 ½ cups granulated sugar
- 3 large eggs
- ⅓ cup plain yogurt
- 7 tablespoons milk
- 2 teaspoons vanilla extract
- 48 chocolate kisses
- 3-4 cups melting chocolate discs
- Sprinkles
Instructions
In a small bowl, microwave butter until melted. Set aside to cool slightly.
In a large bowl whisk together flour, cocoa powder, baking powder, baking soda, espresso powder, and salt.

In the bowl of a stand mixer, beat butter and sugar until combined, about 2-3 minutes.
Mix in the eggs, yogurt, milk, and vanilla.
Reduce the speed of mixer and slowly add dry ingredients until just combined.

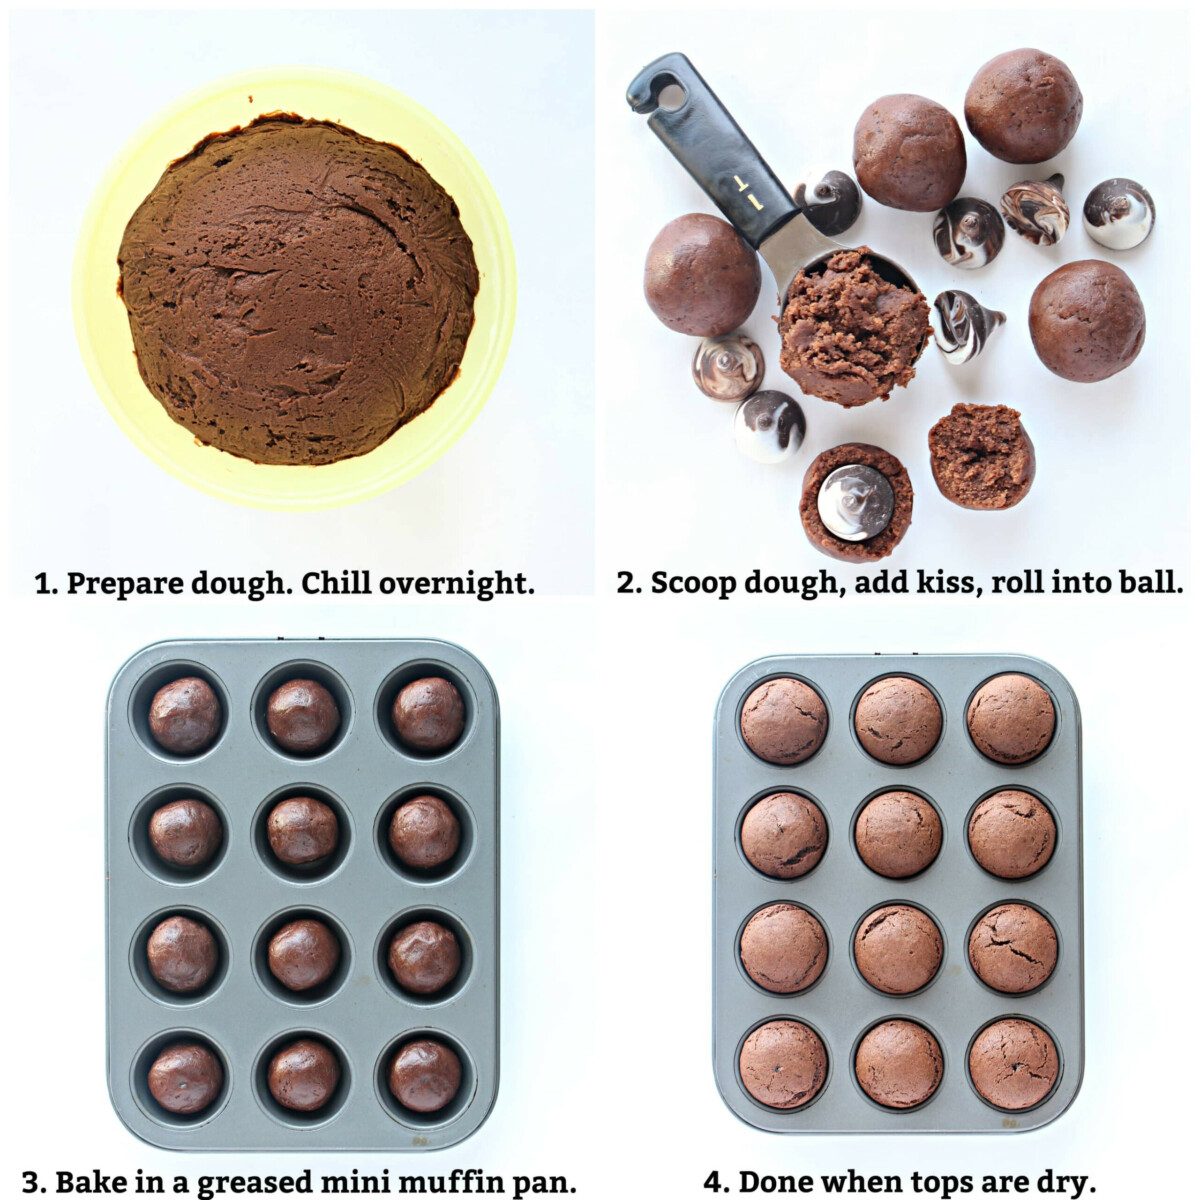
Cover dough with plastic wrap, then chill dough in the refrigerator overnight.
When ready to bake, heat oven to 350˚F. Lightly coat the cups of a mini muffin pan with cooking spray. Remove the chilled dough from the fridge.
Scoop 1 tablespoon of dough. Tear the ball in half and insert an unwrapped kiss at the center of the cookie dough. Put the dough ball halves back together and roll into a ball covering the chocolate kiss inside.
Place one dough ball in each mini muffin cup and bake for 10-12 minutes. The cookies are done when the top looks evenly dry. Don’t worry about any wrinkles or cracks. They will be covered with the chocolate coating.
Cool cookies in the pan for 10 minutes before transferring the cookies onto wire racks to cool completely.
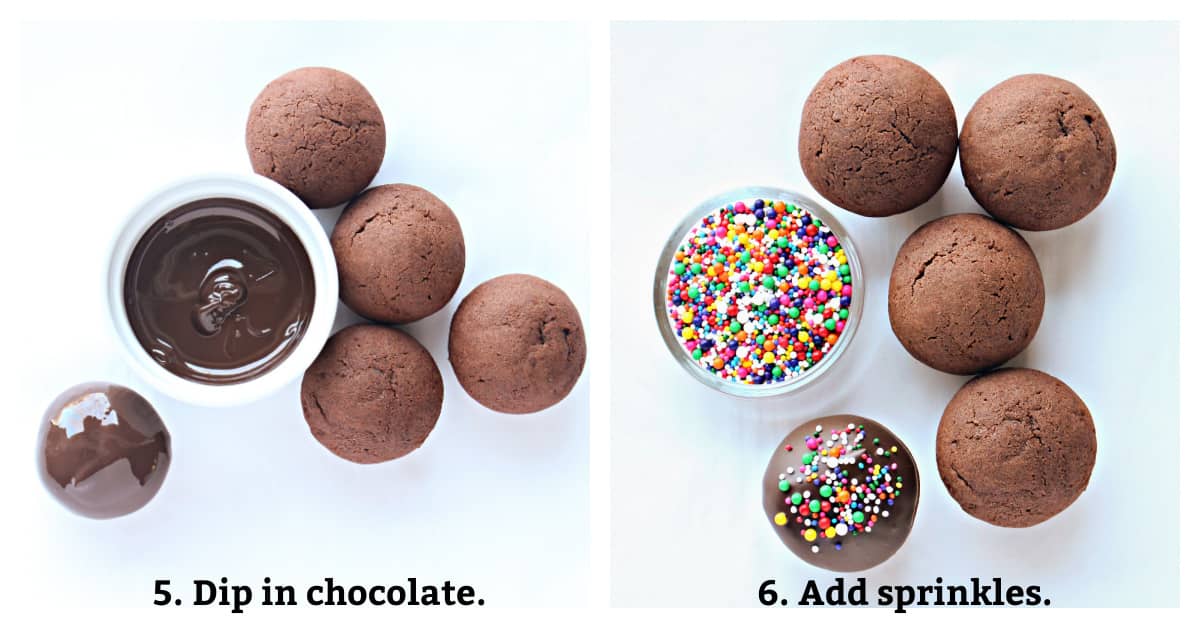
Melt the chocolate coating discs in a small bowl in the microwave at 50% power for 30 seconds. Stir, then return to the microwave for 10-20 second intervals at 50% power just until completely melted.
Dip the cookie directly into the bowl of melted chocolate. Place the cookies on a tray lined with wax paper or parchment paper and sprinkle each cookie immediately after coating. After completing 6 cookies, place the tray in the refrigerator for about 10 minutes to set the chocolate.
The cookies will remain soft and cakey stored in an airtight container at room temperature for up to 10 days.

Notes
For easiest handling of this sticky dough, overnight chilling is recommended.
For more mocha flavor, double the espresso powder in the recipe.
Do not try to bake these cookies on a cookie tray. The dough won’t hold its shape and will flatten.
Homemade chocolate kisses allows for unlimited variations in flavors and colors to match holidays and special events.
Colorful sprinkles make this secret kiss cookies recipe ideal for snacking or gifting for New Years, Valentine’s Day, St. Patrick’s Day, Easter, Christmas, Hanukkah, and gender reveal parties.
Do not use melted chocolate chips for coating the cookies unless they will be eaten the same day. The chocolate will “bloom”, appearing white and spotty after a day or two.
For dipping, use only melting chocolate (compound chocolate) or tempered chocolate for a topping that remains smooth and shiny.
Packaging or plating these cookies in mini cupcake papers makes a pretty presentation that looks like candy bonbons.
Packing tips
In a plastic food storage container, Place cookies in layers separated by wax paper, in a plastic storage container.
Balled up wax paper can be placed between the top cookies and the lid to ensure no movement within the container during shipping.
Wrap the entire container in pla

